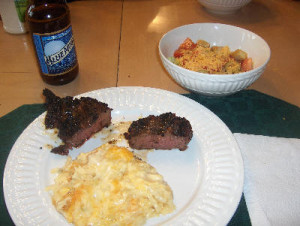
Cooking a great steak dinner is one of life’s simple pleasures. The entire experience, from buying the meat, seasoning it, lighting the chimney and finally the sizzle of cold meat hitting that grate, is an amazing and rewarding experience!
So, let me show you how we cook steaks here at home……………
Whenever meat is involved you have to start with the selection. Meat is graded based on internal marbling….how many thin strands of fat run through it. This is the characteristic that makes it both juicy and tender.
PRIME is top of the line, but very rarely seen outside of restaurants. It can be bought at many specialty butcher shops but is very expensive. The color of a Prime grade of steak is pinkish due to the large number of thin strands of fat throughout it. The best grade for the masses is CHOICE, available at most places that sell any kind of meat. The lowest grade, SELECT, is also around and many stores will try to convince you to try it by pricing it so cheaply. Don’t be fooled! Also, stay away from the “lean” cuts of meat….they have no fat that runs through them, so you get no flavor and dried out meat. It may be healthier, but that is not why you eat steak!
We use Choice meat here at home because it is widely available and the price is reasonable….especially if you look for mark downs and sales. Once you have found some Choice steaks, look at them and see how many thin strands of fat are present. These strands are thin and should be present throughout the entire cut of meat, do not confuse the larger thick strands that may run from one side to the other.

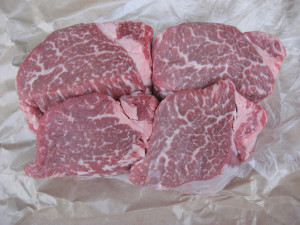
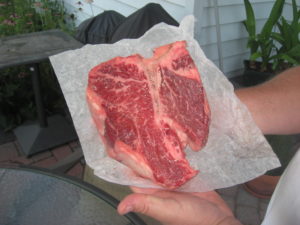
In the above pic, you can see the difference in the type of fat strands. In all of these cuts you can see the large strand of fat on the right hand side….that is NOT what I mean by fat strands! The smaller strands that are found throughout these filets are what you are looking for. As a matter of fact, what you are looking at in this pic is PRIME graded beef. Very rare in the retail markets and very expensive! Thanks to my neighbor Bill White, who is not only a tremendous griller, but also a connoisseur of great meat. In the pic below, Bill was able to snag this Porterhouse, which weighed in at over 2 1/2 lbs.!! Even he was hard pressed to finish it all in one meal!
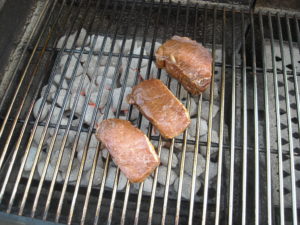
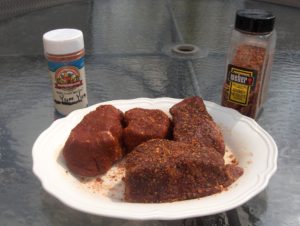
Once you choose your meat, you have to season it! As I have said, “Your meat don’t come pre-seasoned, eh?” A seasoning, called a rub, in grilling circles, is nothing more than your favorite spices combined. A rub can be as simple as salt, pepper and garlic or as extensive as you want to make it. You can make them yourself or there are plenty to choose from at the stores. Check out some of my favorite Rubs. Below are the steaks once they have been rubbed down…………
Once seasoned, let them sit and come to room temp. If your seasoning has lots of salt, you should let them sit for a couple of hours. Why? Initially, salt will draw moisture out of the meat. After about an hour, that moisture will be reabsorbed back into the meat, carrying all those wonderful spices with it.
OK, next step is the fire! I prefer to grill my steaks, but there is a place for pan frying and I use that technique as well. But for now we will stick to grilling. Our preferred grilling technique is using charcoal, though gas works as well, we like the natural flavor that charcoal adds. Not just any charcoal, but all natural hardwood charcoal, referred to as “lump charcoal”. Lump charcoal is characterized by pieces of wood that have been partially burned. These are not the same as the more common briquettes, which use other ingredients so they can be shaped and formed. Lump has 3 benefits………..it burns really hot, upwards of about 800º, it carries the great flavor of wood and it only lasts about 30-45 minutes.
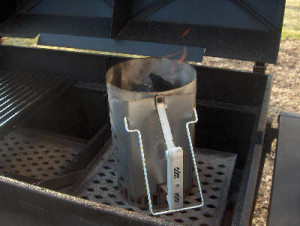
Stay away from using lighter fluid!!! Instead spend about $15 and get yourself a charcoal chimney….like the one pictured below. That stinky old lighter fluid is used to run internal combustion engines…NOT to cook food!!!
Firing a chimney up like this takes about 15-20 minutes, same as a gas grill, and should be part of the pleasurable experience!
You want a very hot fire, so once your coals are ready, be sure to heat the grates up. I usually allow about 5-10 minutes. A hot fire is the key to making a truly great steak. Steak restaurants use a piece of equipment called a “salamander” that reaches temps upwards of 1800º!! My Weber gas grill easily reaches 450-500º and in the summer much higher. And as we discussed previously, a charcoal fire can get much hotter. This is the kind of heat I like for searing those steaks.
Speaking of searing. let me explode one of the most common myths of searing…….that it seals in the juices. No way, No how!! It is impossible to seal juices in any cut of meat unless you literally fuse the long fibers of the meat together. This is more commonly known as burning! In fact, searing begins a process called the Maillard reaction which converts the natural sugars of the meat into hundreds of flavinoids…these complex compounds are where flavor comes from. So, you want a nice hot fire to start that reaction.
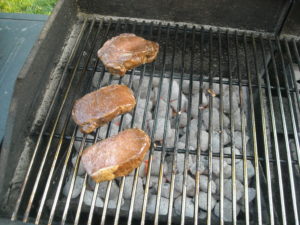
 Once you place your steaks on the hot grill, I leave them on one side for about 2-3 minutes depending on how hot my fire is. Since lump burns so much hotter than gas, I leave on for about 2 minutes with lump and 3 minutes when using the gasser. You can get fancy and sear-in the fancy cross-hatch marks but that is a personal preference. After a couple of minutes, turn the steaks. If you have room on your grill, move them onto a location that has not been used in the previous step. This assures that the “new” location is very hot (meat will cool the grates).
Turn them 90 degrees………
This is impressive to your guests!!
Once you flip your steaks, turn your heat down to a more medium setting, or when using my charcoal grill, I move the grates away from the charcoal which results in a bit cooler temps. Another common method is using a 2 tiered fire…..half the grate sits directly over the coals, the other is away from the coals. Follow this to my section on Indirect Heat. You need to do this, especially with thick cuts of steak. Why? If you leave the heat turned too high, you will burn the outside while the inside is uncooked.
ARE THEY DONE YET?
Times will vary greatly depending on the thickness of the meat, the temp of the grill and how much you want your steaks cooked. The above cuts took another 8 minutes after flipping to finish, but they were pretty thick steaks.
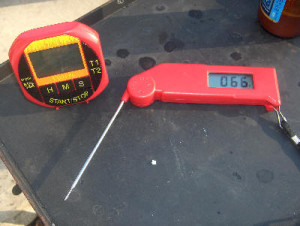

2 pieces of equipment that I suggest for new grillers are a timer and a thermo. Above is a timer I got for $2 at Lowe’s and a rather expensive thermometer from Thermo-Works. These tools will keep you on track with objective data. I always rely on a thermo to check the temp.
Take the steaks off the grill and place on a platter. You will then cover with a piece of foil and let them rest for about 5-10 minutes. Why? This allows the moisture that you have driven to the surface of the meat to be reabsorbed back into the meat which is essential for a juicy steak.

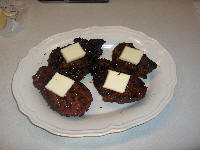 Because of our extensive ties to Wisconsin, we always put a pat of butter on burgers and steaks while they rest!
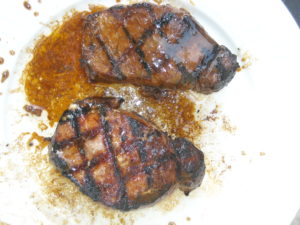
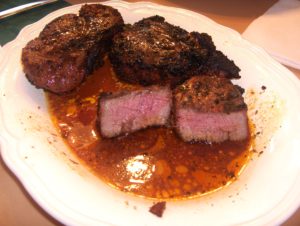
Below you can see the steaks ready to eat. Notice how the juice has mixed with the melted butter? TO DIE FOR!!!!!!!
There you have it! A first-class steak dinner! The whole process should be enjoyed with an adult beverage and surrounded by friends and family!




579 thoughts on “Great Steak”
Comments are closed.